Shooting Remotely
Sometimes social media connects people through common interests or a shared passion - such as photography. But most of the times those people live far apart and the chance to actually work together on a personal level is very small.
I thought about this problem for quite some time and came up with a solution: the concept of shooting remotely!
Now - let me quickly elaborate on why I'm writing this blogpost. Andrew - a friend of mine and fellow photographer, asked me if I would like to work with him as a model. While he is living close to Seattle in the U.S. and me living in Munich/Germany, the chances to get together and shoot are very small because I never get to travel to Seattle. However - Vancouver is only a 3h drive away from Seattle and I do travel to Vancouver from time to time. So there might be a way to make this work sometime in the future.
As we didn't want to wait that long, I proposed we do a remote shoot.
Let me explain to you, how me made it work.
The Setup
It can get a little confusing but if you think about it - it's really no magic.
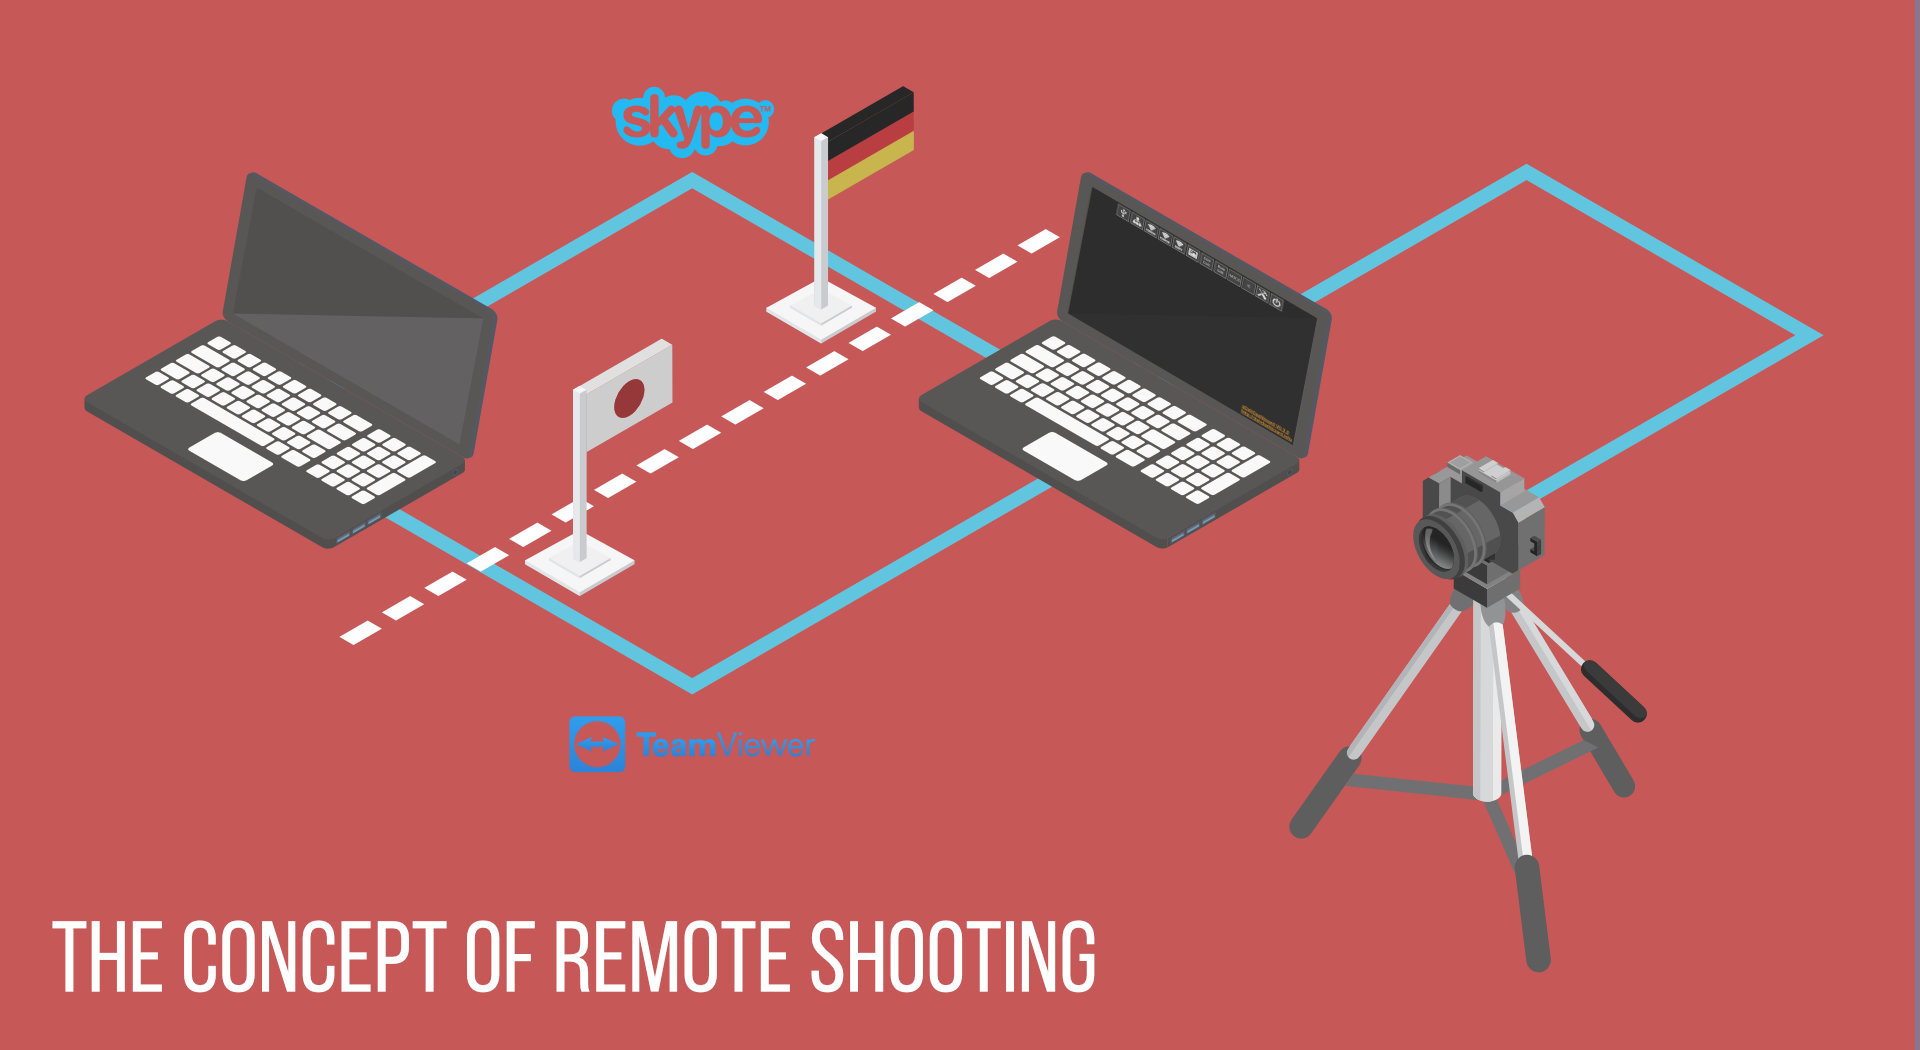
How we made this work is that we prepared a setup that would let me control his DSLR camera from my computer and direct him while I look at the live view of his Nikon D750.
You need 3 basic programs to do that:
1. Skype (for the directing and communicating part)
2. Teamviewer (for controlling his computer)
3. QDSLR Dashboard (for controlling the camera)
All three programs are free and available for Mac and Windows - in fact: I was working on my Windows PC while Andrew used his Macbook.
The setup is pretty simple: Hookup the camera to the computer via USB cable, setup QDSLR Dashboard to recognize and control the camera, connect to the remote computer via Teamviewer and control the camera with QDSLR Dashboard open on the models desktop.
Skype is running alongside to be able to talk to the model and give him directions.
That's basically all you need to do. I've put together a little info graphic showing the whole setup.
Also - we talked about locations and settings beforehand so when we were all connected and ready to go, we already knew how, where and what to shoot. Little tip on the side: keep some spare and charged camera batteries handy as the battery doesn't last that long when using live view the whole time.
And now it is time to show you the results of our session, alongside some more shots I took the same way with Juho in Helsinki...and all that in the comfort of my own home in Munich. 🙂
If you have any questions, feel free to drop me a line in the comment section and I'll be happy to help.


