
Creating a panorama
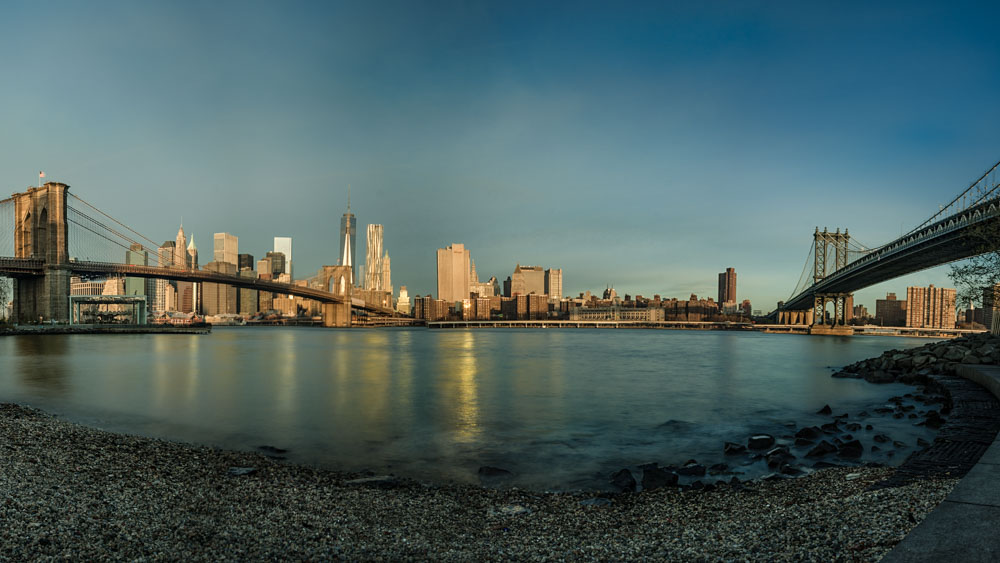
My latest shot „MANHATTAN VS. BROOKLYN” is one I want to talk about. I experimented with pano shots for a while now so some of the techniques valid for these photos were familiar to me. Nevertheless – I came across some amazing photographers on Youtube who put up different tutorials about shooting and editing panoramas. Since I’m always keen to improve my art and workflow, I tried a different approach on this one.
Taking the pictures
My intention that morning was, to capture a timelapse of the sun rising behind me and the light changing on the Manhattan skyline with a new device I lately got – the Triggertrap Mobile Dongle. To be honest – it didn’t work out the way I hoped it would. I think I need to run more tests to get familiar with the settings. Anyway – after giving up on the timelapse, I went back to something I know how to do and I shot a couple of panos. This one is the one I liked most and that made it to post processing after the stitching process. It consists of 7 single portrait shots that then got stitched together. I shot with a ND filter which took the exposure down by 8 stops to give me the latitude to increase my exposure time up to 10 seconds.
Post Processing
After stitching the pano, I started with some basic color corrections to bring out the blue sky and dial down the yellows in the buildings which were quite harsh out of camera. After some dodging and burning to enhance details, I sharpened the image with several highpass filters. I added a vignette to accentuate the center of attention (the skyline) and i added some noise reduction to the sky and water. After that some curves helped me to get the tone I was looking for and after some cleaning up of dustspots from the sensor, the photo was ready for delivery. Alltogether it took me around 3,5 hours to finish the editing.
If you have any questions, feel free to drop me a line in the comment box below.
Teile diesen Artikel